Tampilkan postingan dengan label linux. Tampilkan semua postingan

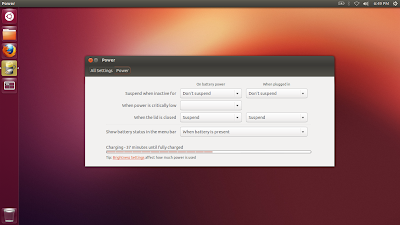
How to Show Battery Indicator on Toshiba L645 without Recompiling Kernel [Sharing Ubuntu 12.10]


--case
Batter indicator didn't show at nav bar on ubuntu. How to show battery indicator or battery status on ubuntu (especially Toshiba L645)??

--solution
try: sudo apt-get install indicator power
still not work? lets try to patching DSDT in recent linux kernels without recompiling

cek:
cat /proc/acpi/battery/BAT1/info
present: no


hemm, why not?
try to take the battery out then reinsert it, it's working again. hope..

Check this out:
---------------
This solution to fix battery indicator problem (not show) on Toshiba L645 without recompiling kernel (I've tried this on my ubuntu 12.10 Quantal Quetzal). For it worked when I first followed the adekroisa's section to fix dsdl (Sharing Linux: Show Battety Indicator Power or Status on Ubuntu 12.04).

-->STEP 1
open terminal then press: sudo su
root@mscdr:/home/roisa# cat /sys/firmware/acpi/tables/DSDT > DSDT.dat
root@mscdr:/home/roisa# iasl -d DSDT.dat
root@mscdr:/home/roisa# gedit DSDT.dsl


-->STEP 2
do not copy/paste when you do the following, or you will get the error “Non-ascii input file – DSDT.dsl” when you try to compile!

search for line : OperationRegion (EMEM, SystemMemory, 0×FF808001, 0×FF)
and replace it with : OperationRegion (EMEM, EmbeddedControl, 0×00, 0×FF)
save the file.

-->STEP 3
build or pacthing DSDT
root@mscdr:/home/roisa# iasl -tc DSDT.dsl
*maybe there're 2 error, fix it like this and build again
search on line 2656, change like this:
code:
0×00000000,    // Granularity
0×00000000,    // Range Minimum
0xFEAFFFFF,    // Range Maximum
0×00000000,    // Translation Offset
0xFEB00000,    // Length


search on line 2663, change like this:
code:
0×00000000,    // Granularity
0xFED40000,    // Minimum
0xFED44FFF,    // Range Maximum
0×00000000,    // Translation Offset
0×00005000,    // Length


-->STEP 4
then rename and move the .aml:
root@mscdr:/home/roisa# mv DSDT.aml /boot/dsdt.aml

Penjelasan dalam Bahasa Indonesia: langkah yang harus dilakukan pada step 4 adalah memindah/move (mv) file DSDT.aml yang dihasilkan dari langkah sebelum (misal tersimpan di directory home, cek lokasi dengan mengetik ls dan tekan enter) dan dipindah ke direktori /boot/dsdt.aml

-->STEP 5
Then add the attached 01_acpi to /etc/grub.d,
renamed it to 01_acpi and chmod +x it;
root@mscdr:/home/roisa#cp 01_acpi /etc/grub.d/
root@mscdr:/home/roisa#chmod +x 01_acpi


Langkah 5 adalah menambah/add file 01_acpi.txt yang berisi script patching (untuk mendapatkan file 01_acpi dapat di download disini atau disini, atau copy paste dan simpan script dibawah ini ke direktor home dengan nama 01_acpi), copy (cp) file 01_acpi ke direktori /etc/grub.d/ kemudian  ubah 01_acpi agar file tersebut dapat di eksekusi chmod +x 01_acpi.

--script of 01_acpi--
   
#! /bin/sh -e
# Uncomment to load custom ACPI table
GRUB_CUSTOM_ACPI="/boot/dsdt.aml"

# DON'T MODIFY ANYTHING BELOW THIS LINE!

prefix=/usr
exec_prefix=${prefix}
libdir=${exec_prefix}/lib

. ${libdir}/grub/grub-mkconfig_lib

# Load custom ACPI table
if [ x${GRUB_CUSTOM_ACPI} != x ] && [ -f ${GRUB_CUSTOM_ACPI} ] \
&& is_path_readable_by_grub ${GRUB_CUSTOM_ACPI}; then
echo "Found custom ACPI table: ${GRUB_CUSTOM_ACPI}" >&2
prepare_grub_to_access_device `${grub_probe} --target=device ${GRUB_CUSTOM_ACPI}` | sed -e "s/^/  /"
cat << EOF
acpi (\$root)`make_system_path_relative_to_its_root ${GRUB_CUSTOM_ACPI}`
EOF
fi


-->STEP 6
then run update-grub2
root@mscdr:/home/roisa# update-grub2

restart and go get gold.. ;)

just try. Bismillah.. :)

Salam Go Get Gold,


Roisa Mscdr

reference: http://adekroisa.blogspot.com/2012/07/sharing-linux-problem-solved-how-to.html

XAMPP: Another MySQL daemon is already running [Sharing Ubuntu 12.10]


XAMPP: Another MySQL daemon is already running.

Pernah mengalami hal seperti ini? thats never mind.. just follow this step..

--case--
when open terminal and show this
roisa@ar-mscdr:~$ sudo /opt/lampp/lampp start
[sudo] password for roisa: 
Starting XAMPP for Linux 1.8.0...
XAMPP: Starting Apache with SSL (and PHP5)...
XAMPP: Another MySQL daemon is already running.
XAMPP: Starting ProFTPD...
XAMPP for Linux started.
roisa@ar-mscdr:~$

--alternative solution--
open terminal (ctrl+alt+t) then type..
sudo /etc/init.d/mysql stop
*stop untuk memberhentikan proses mysql lain, lanjut..
sudo /etc/lampp/lampp restart
*restart, seperti halnya nyalain ulang komputer klo ini lampp nya

if you have another case like this:
XAMPP: Another web server daemon is already running.
XAMPP: Another MySQL daemon is already running.
XAMPP: Starting ProFTPD…
XAMPP for Linux started.

just follow same step, to stop apache web server type this:
sudo /etc/init.d/apache2 stop

finally, you can go to localhost on your browser.


Go tricks,


Roisa Mscdr

New XAMPP 1.8 security concept problem | Sharing Ubuntu 12.10


New XAMPP 1.8 security concept problem


--case--
Access forbidden!
New XAMPP security concept:
Access to the requested object is only available from the local network.
This setting can be configured in the file "httpd-xampp.conf".
If you think this is a server error, please contact the webmaster.
Error 403

localhost
Apache/2.4.2 (Unix) OpenSSL/1.0.1c PHP/5.4.4

--alternative solution--
roisa@mscdr:~$ sudo -s
roisa@mscdr:~$ type your password
root@mscdr:/# cd /opt/lampp/phpmyadmin
root@mscdr:/opt/lampp/phpmyadmin# chmod 644 config.inc.php
root@mscdr:/opt/lampp/phpmyadmin# cd /
root@mscdr: /opt/lampp/lampp restart

--another solution--
sudo gedit /opt/lampp/etc/extra/httpd-xampp.conf

in gedit, Find:
<Directory "/opt/lampp/phpmyadmin">

then add the line to the <Directory>:
Require all granted

actually, the section reads:
<Directory "/opt/lampp/phpmyadmin">
    AllowOverride AuthConfig Limit
    Order allow,deny
    Allow from all
    Require all granted
</Directory>

save dan clode gedit.. restart lampp
/opt/lampp/lampp restart

http://roisa.com/phpmyadmin/ now correctly loads. *roisa.com = localhost.

--another solution--
sudo /opt/lampp/lampp security

then set yours, like this:

XAMPP: Quick security check...
XAMPP: Your XAMPP pages are secured by a password.
XAMPP: Do you want to change the password anyway? [no] 


set your password, remember! use easy password but difficult to hack. hehe

finally, it works..

Go share tricks,


Roisa Mscdr

Install and Setting XAMPP on Ubuntu 12.10 'Quantal Quetzal'


--case--
How to install XAMPP on Ubuntu 12.10 'Quantal Quetzal' and setting?

--alternative solution--
--> Download or Copy XAMPP
Download XAMPP for Linux from here, this is the lastest version now: http://www.apachefriends.org/download.php?xampp-linux-1.8.1.tar.gz

--> Installing XAMPP
Open terminal (ctrl+alt+t), go to directory that XAMPP was downloaded, ex:
roisa@ar-mscdr:~$ cd /media/Spirit/gz/

Extract to /opt with root access:
sudo tar xvfz xampp-linux-1.8.1.tar.gz -C /opt

Easy install yow!

--> Start XAMPP
roisa@ar-mscdr:~$ sudo /opt/lampp/lampp start
Starting XAMPP for Linux 1.8.0...
XAMPP: Starting Apache with SSL (and PHP5)...
XAMPP: Starting MySQL...
XAMPP: Starting ProFTPD...
XAMPP for Linux started.

just change start to other command like this:
*restart, to restart XAMPP
*stop, to stop XAMPP

--> Check localhost
really works? check on your browser
http://localhost

sip.. if you've problem with security concept check this: Sharing Ubuntu 12.10 | New XAMPP 1.8 security concept problem or fix security (optional) by typing this:
sudo /opt/lampp/lampp security

--> Add XAMPP to the Unity Dash
Open the Ubuntu 12.10 Unity Dash and start the Main Menu application.

Then, Select the category that you want XAMPP put in (Internet) and click the New Item button. This will display the “Launcher Properties”, select Lampp.
The Command should be:
gksudo /opt/lampp/share/xampp-control-panel/xampp-control-panel


An XAMPP icon can be found at /opt/lampp/htdocs/xampp/img/logo-big.gif

--> Setting folder public
Make directory and change the permissions on the new folder to allow websites to load correctly.
roisa@ar-mscdr:~$ mkdir public_html
roisa@ar-mscdr:~$ sudo chmod 777 -R public_html
[sudo] password for roisa: 
roisa@ar-mscdr:~$ cd /opt/lampp/htdocs
roisa@ar-mscdr:/opt/lampp/htdocs$ sudo ln -s /home/roisa/public_html ./roisa

*roisa can change with your own ubuntu username

check it: http://localhost/roisa
nice..
note: you can also change setting folder localhost with
sudo chmod 777 -R /opt/lampp/htdocs

Finally, explore your web dev knowledge. I see you're web entusiastic..

Reference:
http://www.apachefriends.org/en/xampp-linux.html
http://www.upubuntu.com/2011/11/how-to-add-applications-manually-to.
http://andyhat.co.uk/2012/07/installing-xampp-32bit-ubuntu-11-10-12-04/

Go get gold,


Roisa Mscdr

Sharing Linux: Efek Dahsyat Compiz Config Settings Manager di Ubuntu 12.04 Precise Pangolin Part 2


Sharing Linux: Efek Dahsyat Compiz Config Settings Manager di Ubuntu 12.04 Precise Pangolin


Setelah membuat tampilan cantik pada Ubuntu 12.04 Precise Pangolin seperti UbuntOS X++ (gaya gue) dengan formulasi cairo dock dan efek magic lamp wavy ccsm (CompizConfig Settings Manager). Selanjutnya, penjelasan lebih dalam dan seru menyelami efek super dahsyat Compiz di Ubuntu 12.04 Precise Pangolin. Check this out. lanjutan sebelumnya..

[Ubuntu 5] Efek Dahsyat 3D Windows - Compiz Config Settings Manager pada Ubuntu 12.04 Precise Pangolin
Ubuntu bisa menampakan windows 3D? yah, yang bikin jauh beda dengan OS lain nih.. efek 3D dimensi yang muncul bikin seneng, wkwk.. Check this out:


Aktifin effects 3D Windows dengan centang pada pilihan efek 3D Windows


[Ubuntu 6] Efek Dahsyat Cube Reflection and Deformation - Compiz Config Settings Manager pada Ubuntu 12.04 Precise Pangolin
Efek Cube Reflection and Deformation dikombinasi dengan Desktop Cube dan 3D Windows bikin tampilan ubuntu makin keren. Check this out:


Aktifin efek Cube Reflection and Deformation dengan klik/centang pada Effects pilih Cube Reflection and Deformation, untuk lebih seru nya ubah setingan Cube caps pada Top Image files dan Bottom Image files (biar muncul gambar di bagian atas dan bawah sehingga tidak berwarna putih polos).


Edit Reflection mode sesuka hati dan edit Deformation sesuai keinginan pada tab menu masing-masing.


[Ubuntu 7] Efek Water atau Air pada Ubuntu - Compiz Config Settings Manager pada Ubuntu 12.04 Precise Pangolin
Muncul air yang menyebar di area kerja ubuntu (desktop), wah.. tidak perlu cemas, itu malah bisa buat refreshing.. hehe.. Check this Out:


Aktifin Water Effect untuk mengeluarkan efek air yaitu pada bagian Effects dengan klik/centang. Untuk memunculkan efeknya tekan ctrl+super (pindahkan pointer sesuai keinginan, maka akan diikuti keluarnya efek air).


[Ubuntu 8] Efek Wobbly Windows (Window bergoyang-goyang) - Compiz Config Settings Manager pada Ubuntu 12.04 Precise Pangolin
Nah, efek yang ini bikin window/jendela kerja terasa enteng dan lentur bisa digoyang-goyang sesuka hati dengan menekan mouse kiri (hold) dan memindah-mindahnya sesuka hati (bisa di minimaze ato maximaze)


Wokee.. dan masih banyak efek menarik lainnya.. go get gold.

"just believe that Allah won't give something that you cannot bear.., Allah won't ask you to do what you can't do. Just believe that you can do it. You can bear it. :D"

Semoga bermanfaat
Go fight linux


Roisa Mscdr

Sharing Linux: Efek Dahsyat Compiz Config Settings Manager di Ubuntu 12.04 Precise Pangolin Part 1


Sharing Linux: Efek Dahsyat Compiz Config Settings Manager di Ubuntu 12.04 Precise Pangolin


Setelah membuat tampilan cantik pada Ubuntu 12.04 Precise Pangolin seperti UbuntOS X++ (gaya gue) dengan formulasi cairo dock dan efek magic lamp wavy ccsm (CompizConfig Settings Manager). Selanjutnya, penjelasan lebih dalam dan seru menyelami efek super dahsyat Compiz di Ubuntu 12.04 Precise Pangolin. Check this out. NB: sharing ini diterbitkan di blog adekroisa.co.cc ato adekroisa.blogspot.com tidak lain tidak bukan secara khusus biar tidak lupa-lupa mulu, dan secara umum biar bisa bermanfaat :)

[Ubuntu 1] Efek Dahsyat 3D Dekstop Cube - Compiz Config Settings Manager pada Ubuntu 12.04 Precise Pangolin
Desktop cube merupakan salah satu tampilan populer di linux ubuntu yang bikin senang, dengan membuat desktop cube (kubus dengan 4 desktop). Check this out:


Untuk mewujudkan tampilan desktop seperti cube pada melakukan perubahan setting pada General Option dan mengubah Desktop Size menjadi 4 (kalo adek roisa semua di ubah menjadi 4, baik Horizontal Virtual Size, Vertical Virtual Size, dan Number of Dekstop)


[Ubuntu 2] Efek Dahsyat Rotate Cube - Compiz Config Settings Manager pada Ubuntu 12.04 Precise Pangolin
Rotate Cube juga populer di kalangan pengguna ubuntu yang memanfaatkan compiz sebagai penambah formula cantik ubuntu. Untuk mengaktifkan tinggal centang pada menu Desktop, centang Rotate Cube. Efek dahsyat rotate cube muncul ketika menekan keyboar ctrl+alt+panah (kanan/kiri) sebagaimana setingan pada Bindings. Check this out:


[Ubuntu 3] Efek Dahsyat Animasi Magic Lamp Wavy Ubuntu - Compiz Config Settings Manager pada Ubuntu 12.04 Precise Pangolin
Magic Lamp Wavy merupakan efek populer pada Max OS X di Ubuntu yang dapat memberikan animasi open, close, minimaze pada window secara magic seperti pada lampu ajaib (seluruttt, muncul window). Check this out:


Aktifin Magic Lamp Wavy Compiz Ubuntu 12.04 pada Open Animation dan Minimize Animation


[Ubuntu 4] Efek Dahsyat Animasi Burn Window - Compiz Config Settings Manager pada Ubuntu 12.04 Precise Pangolin
Efek Burn pada ubuntu menyebabkan window seolah terbakar, check this out:


Kalo adekroisa mengeluarkan efek ini pada window Close, centang Animation Add-on terlebih dahulu, kemudian masuk menu Animations edit Close Animation, pilih Burn pada Close Effect dengan Duration 250 (boleh sesuka hati), siip selamat menikmati efek burn pada linux ubuntu tercinta.


Wokee.. dan masih banyak efek menarik lainnya.. go get gold..


Semoga bermanfaat
Go fight linux


Roisa Mscdr

Sharing Linux: Fix GPG Error on Ubuntu 12.04 Precise Pangolin's Update


Sharing Linux: Fix GPG Error on Ubuntu 12.04 Precise Pangolin 'while sudo apt-get update'


case:
W: GPG error: http://ppa.launchpad.net precise Release: The following signatures couldn't be verified because the public key is not available: NO_PUBKEY 6AF0E1940624A220

open terminal (ctrl+alt+t)

[solution 1]
sudo apt-get clean
cd /var/lib/apt
sudo mv lists lists.old
sudo mkdir -p lists/partial
sudo apt-get clean
sudo apt-get update


[solution 2]
  sudo apt-key adv --keyserver keyserver.ubuntu.com --recv-keys
  sudo apt-key adv --keyserver keyserver.ubuntu.com --recv-keys YOURKEYNUMBERHERE

note: YOURKEYNUMBERHERE mean you key, for adekroisa's case is 6AF0E1940624A220 (look at case).. become like this:

  sudo apt-key adv --keyserver keyserver.ubuntu.com --recv-keys 6AF0E1940624A220

then.. update you ubuntu 12.04 precise pangolin
  sudo apt-get update


reference:
http://askubuntu.com/questions/85641/how-do-i-deal-with-unauthenticated-sources-errors-in-the-software-center
http://askubuntu.com/questions/102153/untrusted-package-errors-after-installing-security-tools
http://askubuntu.com/questions/36507/gpg-public-key-error-message

Finish, wokee..

Alhamdulillah.. how it will be useful :)


Linux for Human Being
Get the Challange,


Roisa Mscdr

Sharing Linux: Problem Solved, How to Show 'Battery Status' Indicator on Ubuntu 12.04 Precise Pangolin (Lepi = Toshiba Satellite L645)


Sharing Linux: Problem Solved, Battery Status Indicator on Ubuntu 12.04 Precise Pangolin (Lepi = Toshiba Satellite L645) 

before.. 

after..

Have tried to how to install battery status, or battery state, or battery indicator, or battery icon, or battery power management, or battery notification, or battery percentage, or batmon.app (maybe adekroisa have tried) with the notebook/netbook/lepi/laptop that have same specification with this? check this out..

Spesification:
Merk: Laptop (lepi) Toshiba Satellite L645
OS: Linux >> Ubuntu 12.04 Precise Pangolin
Kernel Linux 3.2.0-26-generic-pae
GNOME 3.4.1

Case: Machine is NOT running on battery and hence we cannot measure power usage
sudo add-apt-repository ppa:colin-king/
sudo apt-get 
sudo apt-get install 
sudo pm-powersave true
powerstat
on adekroisa's lepi >> "Machine is NOT running on battery and hence we cannot measure power usage."

How can I install that all apps that I mention above, I just realeased that the problem is about Fix Toshiba battery issue for Linux. Yes, thats right on some Linux. Toshiba are two set data boot that give information OS hardware what is include in machine. Windows can read it well, but Linux notyet. We need to build kernel on our own to create it happen. We need to take DSDT from machine with ASL modification and AML DSDT can be compiled.

DSDT mean Differentiated System Description Table.

OS lepi=Ubuntu, OS hp=Android, that great.. but how if the battery cannot be detected?? hemm.. look cupu.. wkwk

Don't forget to be super user, sudo su on terminal first. To launch the terminal just type 'Ctrl+Alt+t'
sudo su
then, type your password.

[STEP 1] Check battery detection status on lepi (Toshiba Satellite L645)
cat /proc/acpi/battery/BAT1/*

like this ye? present: no
yeah, its mean that battery is not detected

[STEP 2] Now, get the original DSDL of machine (Toshiba Satellite L645's with Ubuntu 12.04 Precise Pangolin 'OS Linux')
cat /sys/firmware/acpi/tables/DSDT > DSDT.dat

[STEP 3] Disassemble it with iasl, failed? try to install it before
apt-get iasl
iasl -d DSDT.dat
vi DSDT.dsl

note:
search for line : OperationRegion (EMEM, SystemMemory, 0×FF808001, 0×FF)
then replace it with : OperationRegion (EMEM, EmbeddedControl, 0×00, 0×FF)
save it.

[STEP 4] Build the DSDT, in condition of super user mode on terminal (for me: root@ar-mscdr:/home/roisa#). This will creat a file DSDT.hex for kernel recompilation.
iasl -tc DSDT.dsl

if you find error, try to edit again
gedit DSDT.dsl

Line 2656 changed to
0xFEB00000,         // Length

Line 2663 changed to
0×00005000,         // Length

iasl -tc DSDT.dsl

[STEP 5] install some package (necessary packages)
apt-get install fakeroot kernel-wedge build-essential makedumpfile kernel-package libncurses5 libncurses5-dev

apt-get build-dep --no-install-recommends linux-image-$(uname -r)

needs enough time, depend on connection :)

[STEP 6] play on folder 'source'
mkdir /root/source
cd /root/source

apt-get source linux-image-$(uname -r)

[STEP 7] Play on linux folder (as your kernel version, ex: linux-3.2.0 on adekroisa's lepi)
root@ar-mscdr:/home/roisa# cd /root/source/linux-3.2.0/
cp -vi /boot/config-3.2.0-26-generic-pae .config

note: 3.2.0-26-generic-pae its depend on yours, its kernel version on adekroisa's lepi
cp /home/roisa/DSDT.hex /root/source/linux-3.2.0/include/

[STEP 8] Play with file .config and the word 'config'
gedit /root/source/linux-3.2.0/.config

try to change like this (save and quit):
CONFIG_STANDALONE=n
CONFIG_ACPI_CUSTOM_DSDT=y
CONFIG_ACPI_CUSTOM_DSDT_FILE="DSDT.hex"

  start compiling the kernel,
  first: load the .config file,
  second: save menu for .config file and last: exit.
  note: maximize the terminal window

  make menuconfig

[STEP 9] Get Knowledge about your concurrency level (case: adekroisa's lepi have a Intel Core i3 processor)
root@ar-mscdr:/home/roisa# cat /proc/cpuinfo | grep -i processor
processor : 0 
processor : 1
processor : 2
processor : 3

adekroisa got 4 processor, its mean that concurrency are 4+1=5
export CONCURRENCY_LEVEL=5

[STEP 10] Let's start, my custom kernel is adekroisa, hehe.. its my name get from 'Roisatul Azizah' called 'Adek Roisa' or 'Roisa', recompiling kernel.. but you also can do it without recompiling kernel. 
make-kpkg clean

fakeroot make-kpkg --initrd --append-to-version=-roisa kernel-image kernel-headers

note: this take several time (wkwkw.. much time dink.. :)
on adekroisa's lepi its start before adzan and pray ashar, and finish before maghrib (2.30 pm until 4.30 pm).. wow.. 2 hours.. Alhamdulillah.. hope it will be useful.. size 6.5GB.. hmm. superr..
preview here.


[STEP 11] Let's find the built kernel 'roisa' not 'adekroisa' or 'roisatul azizah' or 'roisa mscdr'
cd /root/source
dpkg -i linux-image-3.2.19-adekroisa-10.00.Custom_i386.deb
dpkg -i linux-headers-3.2.19-adekroisa-10.00.Custom_i386.deb

make initramfs:
update-initramfs -c -k 3.2.19-roisa
update-initramfs: Generating /boot/initrd.img-3.2.19-adekroisa

update-grup

references:
http://techinterplay.com/fix-toshiba-battery-issue-linux.html
http://blog.michael.kuron-germany.de/2011/03/patching-dsdt-in-recent-linux-kernels-without-recompiling/
http://www.tonymacx86.com/viewtopic.php?f=34&t=35627
https://bugs.launchpad.net/ubuntu/+source/linux/+bug/703302
https://bugzilla.kernel.org/show_bug.cgi?id=34532
https://bugzilla.kernel.org/show_bug.cgi?id=15707
http://homeport.org/~bcordes/satellite-l500-install.html
http://www.insanelymac.com/forum/lofiversion/index.php/t189272-100.html
http://en.gentoo-wiki.com/wiki/ACPI/Fix_common_problems
http://www.lesswatts.org/projects/acpi/overridingDSDT.php
http://www.question-defense.com/2010/09/26/how-to-recompile-your-ubuntu-10-10-kernel-for-patching-or-to-add-support-for-a-specific-device
http://ubuntu-indonesia.com/forums/ubbthreads.php/topics/72904/Mengatasi_masalah_baterai_lapt#Post72904
http://ubuntu-indonesia.com/forums/ubbthreads.php/topics/106034/share_solusi_battery_untuk_lap

Finish, wokee.. restart lepi (laptop) to feel the great effect..

NOTE: special for ATI user or ATI Mobility Radeon, after this recompiled 'new custom kernel' do this to show your missing launcher, dash and navbar, check ki dot:
sudo apt-get install --reinstall unity && sudo reboot

or this
sudo apt-get install fglrx


Finish, wokee.. restart lepi again to feel the great effect..


Alhamdulillah.. how it will be useful :)


Linux for Human Being
Get the Challange,


Roisa Mscdr

Sharing Linux: Tampilan Cantik UbuntOS X++ pada Ubuntu 12.04 Precise Pangolin


Sharing Linux: Tampilan Cantik UbuntOS X pada Ubuntu 12.04 Precise Pangolin

Macbuntu-Xii-Cairo for Cairo Dock theme dapat mempercantik tampilan, dengan daya guna yang baik tentunya.


[step 1]
type this:
sudo apt-get install gnome-panel cairo-dock indicator-applet-indicator-applet-appmenu indicator-applet-session indicator-application indicator-appmenu gnome-search-tool

[step 2]
copy paste folder Macbuntu-Xii-Cairo ke /usr/share/cairo-dock/themes
ketik super dan cari kata 'cairo', buka deh..

[step 3]
Menambahan efek Compiz animasi Magic Lamp Wavy, buka CCSM lalu pilih efek "Animation", pilih tab "Minimize...". Ubah efek "Zoom" menjadi "Magic Lamp Wavy"

wokee.. lets try this UbuntOS X (Cairo Dock + Gnome-panel 3.4)

kalo belum install compiz.. here:
1. install ccsm
  sudo apt-get install compizconfig-settings-manager  (setelah nulis compiz, langsung tekan tombol tab, ntar keluar pilihan)

  jangan lupa update compiz plugin extra nya.. ini:
  sudo apt-get install compiz-plugins-extra

2. aktifkan fitur Desktop cube
3. pilih preference, tambah columns=4, rows=1
4. tekan kombinasi ctrl+alt+left/right, atau dengan ctrl+alt+klik kiri mouse (tahan) dan dapat dimainkan
selanjutnya untuk membuat lebih menarik dapat mengaktifkan fitur pada kategori utility - wallpaper
1. Window Configuration Editor lalu klik apps - nautilus - preference dan anda cari pilihan Show Desktop
2. pada menu preference hilangkan centang show_desktop, lalu tekan super+E

ada lagi, efek 3D mboiz
1. Desktop - double klik Desktop Cube - tab appearance - klik Skydome dan ganti Skydome Image sesuai dengan keinginan

ada lagi, di cube caps appearence
Pada kategori Effects - double klik Enable 3D Windows pada misc options coba masukkan nilai minimum size dan windows space

ini juga seru,
Buka CCSM - Effects - Double Klik Animations, pada tab Open Animations coba klik Open Effect dan klik Edit lalu masukkan kriteria seperti:
1. curved fold
2. glide 1
3. sidekick


Finish, wokee.. logout lepi untuk melihat efek dahsyatnya :)


Semoga bermanfaat
Salam Open Source,


Roisa Mscdr

Sharing Linux: Rekomendasi Paket Aplikasi 'Sesuatu Bangetz' setelah install Ubuntu 12.04 Precise Pangolin Part 1


Sharing Linux: Rekomendasi Paket Aplikasi 'Sesuatu Bangetz' setelah install Ubuntu 12.04 Precise Pangolin Part 1


Sebelum melanjutkan, Remember: just type Ctrl+Alt+t to open 'terminal'.. siip

motto ane dulu:
  install biar bisa connect pake smartfren :) semangat.. insyaAllah.. pasti bisa.. Bismillah..
  install tampilan UbuntOSX++ seru..
  install ubuntu restricted extras
  install master yang diperlukan,

saat ini? waktunya disharingkan, semoga bermanfaat..

[Super 1] Ubuntu 12.04 Precise Pangolin: Install File *.tar.gz (contoh kasus xampp)
1. extract file nya, dengan perintah
  sudo tar -zxfv xampp--.tar.gz
2. setelah berhasil di ekstra maka terbentuk folder baru dengan nama yang sama (kecuali .tar.gz)
3. masuk pada folder tersebut dengan perintah
cd xampp--
4. selanjutnya lihat isi (dengan perintah: 'ls') biasanya terdapat file readme atau install, baca dulu, perintah
  ./configure
  make
  sudo make install

jika tidak berhasil dengan perintah -zxfv, bisa di hapus 'v' nya.. hehe..

sip.. installasi berhasil semoga bermanfaat salam dari saya boy, 'roisa'


[Super 2] Ubuntu 12.04 Precise Pangolin: Install file *.deb (kasus install codeblocks)
untuk file .deb codeblock nya yang uptodate ya.. cek web nya.. bisa via search engine :)
1. inget lokasi file *.deb nya?, oke, lakukan perintah
  cd codeblocks
2. perintah cd digunakan untuk mengarahkan pada directory yang di inginkan, dalam kasus ini mengarah ke folder codeblocks. Nah, karena pada folder tersebut terdapat lebih dari satu file *.deb, maka instalasi dapat dilakukan dengan perintah
  sudo dpkg -i *.deb

kalo lewat online (konek pake modem smartfren ne) langsung aja:
  sudo apt-get install codeblocks

note:
*)dpkg merupakan perintah instal package bawaan dari debian (ubuntu termasuk didalamnya)
*)-i berarti akan dilakukan instalasi (i=install)
*)*.deb merupakan pemanggilan terhadap semua file yang terdapat pada directori (folder codeblock) dengan extensi *.deb, sehingga tidak harus melakukan instalasi file satu persatu.
3. selanjutnya cek langsung dengan perintah super+nama program/aplikasi yang telah di install


[Super 3] Ubuntu 12.04 Precise Pangolin: install driver printer
Langkah awal, download driver nya, untuk Epson klik http://avasys.jp/eng/linux_driver/


[Super 4] Ubuntu 12.04 Precise Pangolin: Mengubah tema Ubuntu, wallpaper dan icon
Cara 1: install theme secara offline
1. Download theme nya disini
http://www.gnome-look.org

Cara 2: install melalui ppa/apt
sudo add-apt-repository ppa:bisigi
sudo aptitude update
sudo aptitude install tropical-theme


[Super 5] Ubuntu 12.04 Precise Pangolin: Install codec dan bermain-main dengan multimedia
1. ketik perintah pada terminal
sudo apt-get install ubuntu-restricted extras


[Super 6] Ubuntu 12.04 Precise Pangolin: Update paket untuk memainkan rhythmbox
gir1.2-gtk-3.0, glib-networking, glib-networking-common, glib-networking-services, libcairo-gobject2, libcairo2, libcups2, libgail-3-0, libgcrypt11, libgssapi-krb5-2, libgtk-3-0, libgtk-3-bin, libgtk-3-common, libk5crypto3, libkrb5-3, libkrb5support0, libsasl2-2, libssl1.0.0, libtasn1-3, libv4l-0, libv4lconvert0, libxml2, openssl, python-gi, python-gobject, python-libxml2, shared-mime-info, upstart


[Super 7] Ubuntu 12.04 Precise Pangolin: Fitur Desktop 3D dengan CCSM
1. install ccsm
  sudo apt-get install compizconfig-- (setelah nulis compizconfig, langsung tekan tombol tab, ntar keluar beberapa pilihan)
2. aktifkan fitur Desktop cube
3. pilih preference, tambah columns=4, rows=1
4. tekan kombinasi ctrl+alt+left/right, atau dengan ctrl+alt+klik kiri mouse (tahan) dan dapat dimainkan
selanjutnya untuk membuat lebih menarik dapat mengaktifkan fitur pada kategori utility - wallpaper
1. Window Configuration Editor lalu klik apps - nautilus - preference dan anda cari pilihan Show Desktop
2. pada menu preference hilangkan centang show_desktop, lalu tekan super+E


ada lagi, efek 3D mboiz (efek yang terkenal dan bisa bikin kepengen para pengguna win ;)
1. Desktop - double klik Desktop Cube - tab appearance - klik Skydome dan ganti Skydome Image sesuai dengan keinginan

ada lagi, di cube caps appearence
Pada kategori Effects - double klik Enable 3D Windows pada misc options coba masukkan nilai minimum size dan windows space

ini juga seru,
Buka CCSM - Effects - Double Klik Animations, pada tab Open Animations coba klik Open Effect dan klik Edit lalu masukkan kriteria seperti:
1. curved fold
2. glide 1
3. sidekick


[Super 8] Ubuntu 12.04 Precise Pangolin: install battery status
Installing Battery-Status in Ubuntu, just try ;)
  sudo add-apt-repository ppa:iaz/battery-status && sudo apt-get update
  sudo apt-get install battery-status

  /usr/lib/battery-status/battery-status --indicator

semoga berhasil..

Finish, wokee.. restart komputer untuk melihat efek dahsyatnya :)


Semoga bermanfaat
Salam Open Source,


Roisa Mscdr

Sharing Linux: Rekomendasi Paket Aplikasi 'Sesuatu Banget' setelah install Ubuntu 12.04 Precise Pangolin Part 2


Sharing Linux: Rekomendasi Paket Aplikasi 'Sesuatu Banget' setelah install Ubuntu 12.04 Precise Pangolin Part 2


Ask: What should I do after installing Ubuntu on my lepi?
You: Maybe, I can follow this recomendation ;)

1. update gedit to be powerfull
terdapat beberapa gedit powerful plugin
  $sudo apt-get install gedit-plugin


you must get this, cek on menu: edit->Preferences->plugin
  snippets
  file browser
  session saver
  color picker
  document words completion

2. install synaptic package manager
  sudo apt-get install synaptic-package-manager

3. install disk burner
  $sudo apt-get install k3b

4. install gkamus (kamus Inggris <-> indonesia)
  $sudo apt-get install gkamus

5. install download manager
berbagai macam Download Manager di GNU/Linux
.wget
.curl
.axel
.jigdo
.downthemall (firefox add-on)
.Aria2 merupakan program download manager berbasis command line, jadi untuk menggunakannya harus menjalankannya di dalam terminal/console (atau, bagi yang suka scripting, dapat mempergunakannya di dalam script
shell).

  sudo apt-get install aria2
  http://aria2.sourceforge.net

File binary dari aplikasi aria2 ada di /usr/bin/aria2c. Jadi untuk menjalankan aria2 ini, kita mengeksekusi file aria2c tersebut.

mendownload
  $ aria2c http://host/image.iso

menekan ctrl+c untuk menghentikan proses transfer
melanjutkan proses dowload
  $ aria2c -c http://xxx.yyy/aaa.iso

download sebuah file menggunakan 2 koneksi
  $ aria2c -s2 http://host/image.iso http://mirror1/image.iso
  http://mirror2/image.iso

Menyimpan download yang error maupun yang belum kelar saat keluar
  $ aria2c -ifiles.txt --save-session=out.txt

aria2 gui
http://ovh.dl.sourceforge.net/sourceforge/aria2fe/aria2fe-0.0.5.tar.bz2

more about aria2? read fui ebook :)

6. Backup hasil install dari repo online
  sudo apt-get install aptoncd
trus di clean
  sudo apt-get clean

7. Mendapatkan DVD repo
ftp://kambing.ui.ac.id/pub/ubuntu-repository/
di bakar ke DVD ato di mount dengan teknik tertentu lewat DVD

.Melalui CLI (Command Line Interface)
sudo apt-cdrom add
sudo apt-cdrom -d /media/cdrom0 -m add
cat /etc/apt/sources.list
cp -rv /cdrom/{dists,pool} /home/najwa/ubuntu-repo/ubuntu-dvd-1/


8. Windows Emulator
install wine (windows emulator) bisa untuk mainin office 14 on ubuntu 12.04
  sudo add-apt-repository ppa:ubuntu-wine/ppa
  sudo apt-get-update && sudo apt-get install wine or sudo apt-get wine1.5

note: Maksud tulisan tentang Wine dibuat untuk membantu end user Windows beradaptasi secara perlahan dengan lingkungan Ubuntu. Jika telah terbiasa dengan aplikasi-aplikasi Ubuntu sangat disarankan untuk tidak lagi menggunakan software-software bajakan yang sering ditemukan di lingkungan sebelumnya. Go Open Source.. Let's Do the best we can do :)

9. Bootable flashdisk sebagai media instalasi Ubuntu
  sudo apt-get install unetbootin

10. instal openssh
  sudo apt-get install openssh-server

11. install webcam ;)
  sudo apt-get install cheese


Finish, wokee..


Semoga bermanfaat
Salam Open Source,


Roisa Mscdr

Sharing Linux: Konek pake Modem CDMA Smartfren AC682 EVDO Rev.A on Ubuntu 12.04 Precise Pangolin


Sharing Linux: Konek pake Modem CDMA Smartfren AC682 EVDO Rev.A on Ubuntu 12.04 Precise Pangolin


OS lepi=Ubuntu, OS hp=Android, seru banget, tapi bagaimana klo ndak online? wkwk.. agak cupu gitu deh.. oke kita coba install modem smartfren di ubuntu 12.04 dengan cara mudah install modem cdma smartfren ZTE AC682 di ubuntu terbaru 12.04 precise pangolin. 

oke, bagaimana agar Ubuntu 12.04 Precise Pangolin bisa konek internet, dengan kasus modem kita adalah CDMA, ato lebih tepatnya smartfren (saat ini modem yang langsung bisa terdetek dan konek di ubuntu masih GSM aja). Dengan beberapa sentuhan sabar, mari go Online with CDMA Evdo Rev. A from Smartfren (anti lelet, katae)

Ubuntu 12.04 Precise Pangolin online dengan install modem CDMA (studi kasus: modem Smartfren AC682 EVDO Rev.A)
Cara 1: Pake Wvdial aja
1. Paket yang dibutuhkan adalah usb_modeswitch (http://packages.debian.org/sid/i386/usb-modeswitch/download), dan wvdial (http://packages.debian.org/sid/i386/wvdial/download

2. Selanjutnya, install dengan perintah
sudo dpkg -i *.deb

3. Inisialisasi modem
sudo lsusb

4. Pada beberapa modem CDMA dikenal sebagai cdrom di ubuntu, oleh karena itu edit dengan perintah berikut (untuk ubuntu versi 12.04 insyaAllah langsung kedetek alias ndak pake eject, tp klo mau coba keduanya
sudo gedit /etc/usb_modeswitch.conf
isi ne:

EnableLogging=0


########################################################
# /etc/usb_modeswitch.conf
#
# Smart ZTE AC682 (EVDO)
#
DefaultVendor = 0x19d2
DefaultProduct = 0xffde


TargetVendor = 0x19d2
TargetProduct = 0xffdd


MessageContent=5553424312345678c00000008000069f030000000000000000000000000000

then:

sudo usb_modeswitch

5. Cek lagi dengan perintah
sudo lsusb
sudo modprobe usbserial vendor=0x19d2 product=0xfff1

6. Selanjutnya wvdialconf, membuat konfigurasi otomatis yang tersimpan di file /etc/wvdial.conf ini dia isinya:
[Dialer Defaults]
Init2 = ATQ0 V1 E1 S0=0 &C1 &D2 +FCLASS=0
Modem = /dev/ttyUSB0
Modem Type = USB Modem
Phone = #777
Idle Seconds = 300
Compuserve = 0
Auto DNS = 1
ISDN = 0
Username = smart
Init1 = ATZ
Password = smart
Modem = /dev/ttyUSB0
Baud = 921600
Dial Command = ATDT
Stupid Mode = 1
Ask Password = 0

7. Oke, tes modemnya
sudo wvdial

Cara 2: Manfaatin Synaptic (plus wvdial)
kalau cara 1 belum berhasil, perlu manfaatin synaptic nih..
install synaptic dan install online langsung wvdial
sudo apt-get install synaptic
sudo apt-get install wvdial
sudo apt-get install usb-modeswitch

setelah itu, mari cek synaptic package manager, pada kolom pencarian ketik "modem", lalu pastikan paket-paket berikut sudah terinstall (jika belum lansung install).. konek pake wifi dulu di kampus ato hotspot area warnet dah..


cek this out:
sl-modem-daemon
sl-modem-source
modemmanager
gobi-loader
isc-dhcp-client
mobile-broadband-provider
usb-modeswitch-data
usb-modeswitch
pcmciautils
ppp
pppconfig

now, open terminal (Ctrl+Alt+t)..
sudo wvdial

like this ye?
[sudo] password for roisa: 
--> WvDial: Internet dialer version 1.61
--> Cannot get information for serial port.
--> Initializing modem.
--> Sending: ATZ
OK
--> Sending: ATQ0 V1 E1 S0=0 &C1 &D2 +FCLASS=0
ATQ0 V1 E1 S0=0 &C1 &D2 +FCLASS=0
OK
--> Modem initialized.
--> Idle Seconds = 300, disabling automatic reconnect.
--> Sending: ATDT#777
--> Waiting for carrier.
ATDT#777
CONNECT 3100000
--> Carrier detected.  Starting PPP immediately.
--> Starting pppd at Sat Jul 14 14:29:46 2012
--> Pid of pppd: 2971
--> Using interface ppp0
--> pppd: xum�[10]Z�[08][08]G�[08][01]
--> local  IP address 10.224.220.238
--> pppd: xum�[10]Z�[08][08]G�[08][01]
--> remote IP address 10.20.31.4
--> pppd: xum�[10]Z�[08][08]G�[08][01]
--> primary   DNS address 10.17.125.230
--> pppd: xum�[10]Z�[08][08]G�[08][01]
--> secondary DNS address 10.17.125.231
--> pppd: xum�[10]Z�[08][08]G�[08][01]

Finish, wokee.. restart/logout lepi (laptop) untuk melihat efek dahsyatnya :)


Alhamdulillah.. ane sudah bisa konek, semoga ente juga bisa.. dan pasti bisa.. :)

Semoga bermanfaat
Go fight linux,


Roisa Mscdr

Sharing Linux: Solusi Pengaturan Brightness pada Ubuntu 12.04 Precise Pangolin


Cannot change brightness? Merasakan hal yang sama setelah install ubuntu 12.04? hehe.. hal yang dimaksud adalah tidak bisa merubah brightness lepi (pencahayaan pada lepi tinggi) setelah install ubuntu 12.04 Precise Pangolin.. oke, try this.. hope will better.. (i'm success on it).. saat ini tombol fn+f6 dan fn+f7 lepi mscdr udah bisa digunakan.. :)


[cara 1]
cek max brightness here:
path: /sys/class/backlight/acpi_video0/max_brightness

max brightness on mscdr's lepi is 7.

Edit the 'rc.local' file. In terminal (Ctrl+Alt+t):
    $gksu gedit /etc/rc.local

Add the code below into the file, before the line exit 0:
    echo 3 > /sys/class/backlight/acpi_video0/brightness
    echo 3 > /sys/class/backlight/toshiba/brightness

[cara 2]
Brightnewss solution. Modify /etc/default/grub using "gksudo gedit grub".

Change this line:
GRUB_CMDLINE_LINUX_DEFAULT="quiet splash"

To:
GRUB_CMDLINE_LINUX_DEFAULT="quiet splash acpi_osi="

Then save the file.

Then before rebooting issue the command in terminal
sudo update-grub

Reboot and the brightness controls should now work


[cara 3]
1) Edit /etc/default/grub and change this variable:
GRUB_CMDLINE_LINUX="pcie_aspm=force acpi_osi=Linux acpi_backlight=legacy"
2) Edit /etc/modprobe.d/blacklist.conf and add this line at the end of the file:
blacklist toshiba_acpi3) Update the grub config file:
sudo grub-mkconfig -o /boot/grub/grub.cfg
Reboot and the problem should be gone.
 

referensi: dari berbagai sumber


Finish, wokee..


Semoga bermanfaat
Salam Open Source,


Roisa Mscdr

Sharing Linux: Mounting Partisi NTFS Windows Otomatis pada Ubuntu 12.04 Precise Pangolin

Sharing Linux: Mounting Partisi NTFS Windows Otomatis pada Ubuntu 12.04 Precise Pangolin


Bismilah.. Setelah membaca beberapa sumber yang ada (via online), ditemukan cara ampun mounting partisi ntfs windows (mount partiotion at startup).

Perintah blkid untuk mekanisme mount pada /etc/fstab di ubuntu versi 12.04 ini menggunakan UUID (identifier partisi).

Step 1:
.Cek id identifier dari partisi yang ingin kita mount
    $ sudo blkid
 
 Then, Like this:
  [sudo] password for roisa:
  /dev/sda1: LABEL="System Reserved" UUID="1016066916064FE0" TYPE="ntfs"
  /dev/sda2: LABEL="AS3" UUID="EC9AB14E9AB11654" TYPE="ntfs"
  /dev/sda3: LABEL="userver" UUID="521f14de-9572-4493-a06a-bb6f9e26c8ae" TYPE="ext4"
  /dev/sda5: UUID="9cf755ef-059e-4ad1-9514-964eaf38e2c2" TYPE="ext4"
  /dev/sda6: LABEL="Share" UUID="2C1A621B1A61E276" TYPE="ntfs"
  /dev/sda7: LABEL="Spirit" UUID="2038DB3D38DB1120" TYPE="ntfs"
  /dev/sda8: LABEL="Smile" UUID="881E16051E15ECC6" TYPE="ntfs"
  /dev/sda9: LABEL="Always" UUID="283C246F3C2439E8" TYPE="ntfs"
  /dev/sda10: UUID="591699e0-d292-4c64-8bcf-fc1d9a4c17fa" TYPE="swap"
  /dev/sda11: UUID="c1720d0e-2ac9-4f26-be0d-f46ce6de68a9" TYPE="ext4"


Step 2:
.Buka /etc/fstab memanfaatkan editor (ex: gedit)
  $ sudo gedit /etc/fstab
.tambahkan ini pada bagian akhir, sesuaikan dengan spesifikasi lepi 
  UUID=2C1A621B1A61E276 /media/Share  ntfs-3g rw,defaults,quiet 0 0
  UUID=2038DB3D38DB1120 /media/Spirit ntfs-3g rw,defaults,quiet 0 0
  UUID=881E16051E15ECC6 /media/Smile  ntfs-3g rw,defaults,quiet 0 0
  UUID=283C246F3C2439E8 /media/Always ntfs-3g rw,defaults,quiet 0 0

Finish, wokee.. restart komputer untuk melihat efek dahsyatnya :)


Semoga bermanfaat
Salam Open Source,


Roisa Mscdr

 
Wedoo Indonesia